Every now and then, I’ll stumble across a real prize at the thrift store.
A couple months ago, I came across this wall candelabra.
It had this icky, antique gold finish.
But lots of details that I knew would look great once I was finished.
I decided to use my crusty paint mixture…..
Just glop it on all over.
It’s best to work outside or over something you can bundle up and toss out…like brown paper.
I do 2 coats…the second coat will stick better.
Then, when it’s completely dry….I recommend leaving it overnight, I use my dry hands and rub off wherever it is loose. This exposes some of the underneath color. If too much comes off, then paint it again and repeat the process until it’s the way you want. If you absolutely don’t want to see any of the original color, then give it a coat of paint first in whatever color you DO want to see.
I then used some dark wax to age it more.
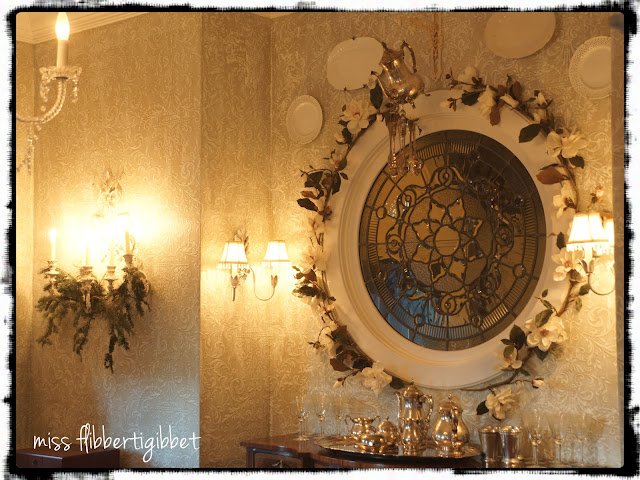
I love how it turned out! It looks great in the new dining room!
I added some fresh greenery to the candle sconce today. I love it against the wallpaper I finished earlier this year. I’m loving my new dining room makeover this Christmas.
I also added some magnolia garland around the leaded window.


 I'm Lorraine. I have a love for home & design and I enjoy sharing that passion with others. I'm so glad you're here to join me.
email: missflibbertigibbet@gmail.com


This is gorgeous! I am making a note of how you did this. Your dining room is so pretty. You must be thrilled with it.
It looks gorgeous. Love how your room looks! Danielle x
Looks absolutely fabulous!
You know you may want to find those fickering faux taper candles I have been seeing out there – they give you the look w/o the worry so close to the boughs and the wall.
Well done!!
I love this. It is amazing with the greenery in it! Gosh, so many things to make and so little time…
I love the effect. Beautiful. Thank you for sharing.
So beautiful, Lorraine…I love what you did with it!
WOW, your redesign turned out beautiful. I love it and the way it looks with the wall paper behind it. The greens add so much for the season. Thank you for sharing.
Yes, I agree with another comment, faux flicker candles would be awesome.
Thank you for stopping by and your kind comment. I have so enjoyed my visit here and now a new follower.
Hugs, Celestina Marie
So elegant, love the technique you’ve used! Looks gorgeous in your dining room!